
Making a movie versus a photo sounds more challenging, but in reality, it is not really complicated, you just need to follow some basic rules and everyone will be impressed!
This article will explain 5-easy steps on how I shot a maternity video, but this can apply to any video project you wish.
5 Tips on shooting a professional, cinematic maternity movie
1) Video Stabilization and Slow Motion
Shooting at double the frame rate of the final product will not only stabilize your video, but it will give a peaceful, cinematic look. Therefore, if your final video will be at 30fps, which my default, then shoot a 50/60fps.
Using a Blackmagic Pocket Cinema Camera, there is a button just for that and that’s my most important thing anytime I record a video. Of course, the sound will be slowed down, but usually, for this kind of video, you will replace the sound with beautiful music and won’t need the original audio.
2) Shooting against the sun at sunset

I was always told to shoot videos with the sun behind my back, but not anymore. Shooting into the sun, preferably at sunset or sunrise, can lead to nice lighting effects and reflections with the subject between you and the sun. For a dramatic effect, try to leak the sun at the edge of the subject.
If your camera is capable of shooting raw, this can help you to adjust the video and luminosity in post-production. Raw videos can take several hundred megabytes per second, but this setting is recommended for this type of shot.
3) Color grading
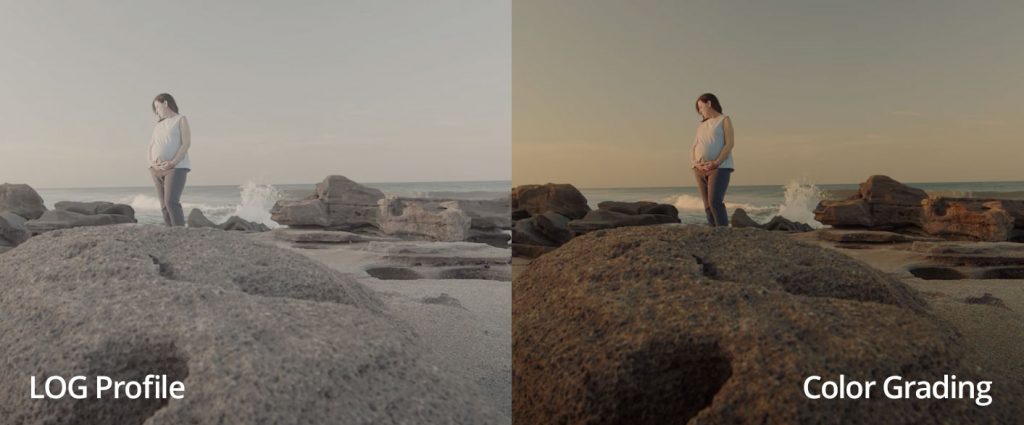
Color grading is the process of altering and enhancing the color of a film. My camera is capable to shot in LOG mode, which creates a very low contrast and saturates footage. This method doesn’t blackout the shadow or burn the highlights, giving you more freedom to enhance and adjust the color in post-production, creating a unique color look throughout the scenes.
In the end, you may add an LUT to give even more a cinematic look. LUTs are color styles that can enhance skin tone or even resemble Hollywood movies look. For example, you can apply the look of the movie Matrix to your footage, if you are looking for a greenish artificial feeling, or a MadMax LUT if you are looking for a sandy post-nuclear feeling.
4) Soundtrack
The most important part of the video is the music. For this particular video, I looked for peaceful, calm music, which is easy to find (without copyright issues) on my Envato Element subscription. When you have selected the track, then sync the scene cuts with the music’s beat and it’s done!
5) Wide aspect ratio 2.39:1 ~ 2.4:1 (“two-four-oh”)
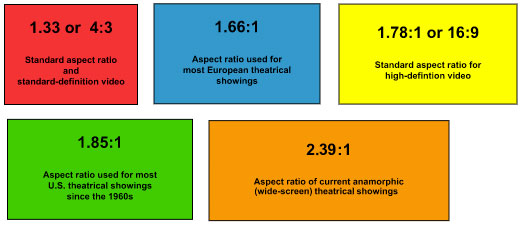

Shooting with this aspect ratio will increase the cinematic look of your film. There are many aspect ratios, but the most used is the 2.39: 1 that many Hollywood movies use. Without going too much in detail, if you shoot in HD your resolution will be 1920×803. For 4K is 4096×1728.
You could do this format in-camera using a special anamorphic lens. But besides using an iPhone Anamorphic Lens, they can cost thousands of dollars, so this setting will probably be done in post-production, simply adjusting the video resolution.


